Calculating a wall area means multiplying the width by the height, then removing openings before ordering a whole number of panels. The correct logic is then to round up to the next whole panel based on the chosen product page.
You are often at the point where the wall has been measured but the cart is not yet ready. That is where the wall area calculation becomes useful: a simple conversion slip or a forgotten opening is enough to skew the order.
Why wall area calculation is the key step
A poorly quantified wall almost always leads to the same problem: either a purchase that is too small or unnecessary offcuts. For a light renovation project, this mistake quickly shows up in the budget, in time, and in the final finish. The correct basis remains simple: the gross area is calculated first, then the net area to be covered is obtained by subtracting what will not be dressed.
Area to measure and area to order
For decorative or acoustic panels, the wall measurement is not only to “know how big it is.” It is mainly used to convert a real space into an orderable quantity. The exact calculation depends on the chosen product, because a rigid panel, a adhesive panel and a cladding are not installed the same way.
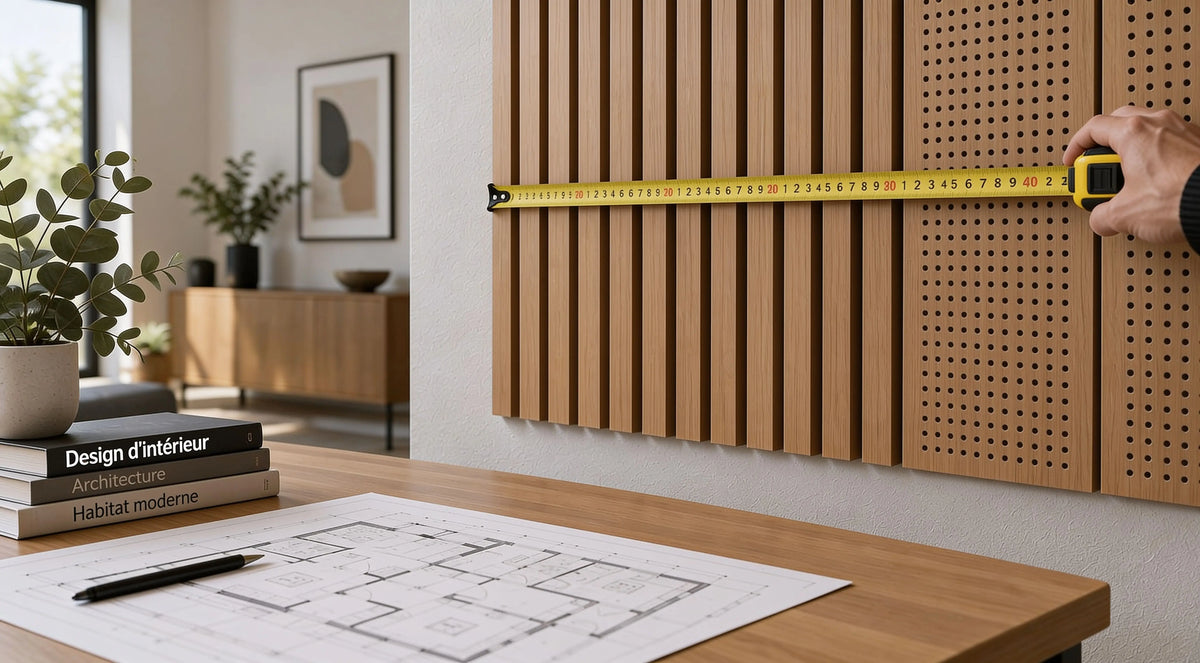
Measure all lengths in meters before multiplying width and height. Then subtract the openings that will not receive covering. For a wall composed of several shapes, calculate each zone separately and add the areas.
Practical rule: the right question is not only “how many m² is the wall?”, but “what net area must be covered with the chosen product?”.
What changes depending on the product
An uncovered wall does not require the same reading as a wall to be fitted. A panel will provide decorative presence and precise coverage, while a rigid PVC panel or an adhesive product requires checking the fixation method and the usable format. On MPDiscount, the good reflex is to start from the product page, not from a generic estimate.
This approach also avoids poorly sized orders when the wall includes a door, a window, a niche or a return. Wall area calculation therefore remains a decision step, not just a DIY formula.
Basic formula for a straight wall
For a rectangular wall, the calculation always starts from the same idea: width × height. If the wall is 4 m wide and 2.5 m high, the gross area is 10 m². This logic is the most reliable to start with because it is based on a direct measurement that is easy to verify.
Remove openings
Openings are handled separately afterwards. Each door or window is also measured by width × height, then the obtained areas are subtracted from the total of the concerned wall. The method is clear: gross area minus area of openings equals net area.
A simple example suffices to fix the idea. A wall 4 m by 2.5 m gives 10 m². If a window of 1 m by 1.2 m is present, the area of that opening is 1.2 m². The net area to cover then becomes 8.8 m².
Manage units properly
Conversion matters as much as the formula. A reading in centimeters must be converted to meters before multiplication, otherwise the result becomes wrong. square units such as m² are used to properly compare the order and the real area, especially when moving from a manual measurement to a shopping cart.
Measuring accurately is useless if the unit is not consistent from start to finish.
On a fitting site, this rigor avoids last-minute corrections. It also makes it possible to prepare a realistic cutting plan, with full strips for solid areas and offcuts reserved for adjustments.
Difference between gross area and usable area of panels
The decisive point, when moving from the wall to the cart, is the difference between gross area and usable area. A wall measured at 10 m² does not mean you must buy 10 m² of any product without checking the format. A panel of 240 × 60 cm covers a defined area, and it is that actual area which serves as the ordering basis.
The product Panneaux Acoustiques Noyer Foncé – 240x60 – 21 mm - Lot de 2 indicates a surface per panel of 1.44 m² and 2.88 m² covered by a lot of 2. These figures show why reading the product page matters as much as calculating the wall. The good reflex is to relate the net wall area to the usable coverage per unit, then round up to the next lot if necessary.
Why format changes the decision
A simple-shaped wall lends itself well to calculation by m². But a rigid panel often requires a layout logic, because you must consider the usable width, the direction of boards, and cuts around corners. For a cladding, the question is not only “how many square meters,” it also becomes “how many whole panels, and in what order to lay them”.
For slatted panels, cutting must be planned before purchase. A poorly placed cut can leave a strip that is too narrow on a visible edge. The installation plan then helps avoid an asymmetric result.
Buying by m² or buying by panel
On a product page, the safest logic remains the following.
- Read the usable coverage, not only the outer dimensions.
- Calculate the net wall area after deducting openings.
- Divide the net area by the coverage per panel or per lot.
- Round up, because a project cannot be completed with a fraction of a panel.
For a wall covering, the most important figure is not always the total area, but the actually installable area.
The same vigilance applies to adhesive products or smooth decorative panels, even if their cutting follows a different logic. Packaging format always determines the final quantity.
Types of panels and installation methods
The installation method depends on the panel and the substrate. Check the instructions shown on the product page before choosing an adhesive, a glue or a mechanical fixing. These systems are not interchangeable and can change wall preparation and cutting plan.
Comparison of installation methods
| Type of panel | Fixing method | Wall preparation |
|---|---|---|
| Adhesive panel | Integrated adhesive or glued installation depending on the range (see product page) | Clean, dry, regular substrate |
| Rigid panel | Silicone adhesive or screwing according to the product page | Sound wall, precise installation marking |
| Rigid PVC | Bonding or other system provided on the product page | Check flatness, angles and substrate compatibility |
To choose between these product families, decor is not enough. Usable area, ease of cutting and substrate tolerance matter as much as the visual effect. The Guide: choosing between wood, PVC and marble helps link aesthetics to the installation method without losing sight of the actual panel format.
What to check before choosing
An adhesive panel forgives little irregularity. A rigid panel accepts a precise layout better, provided it is fixed correctly. Therefore read the product page before confirming the cart.
Cutting also impacts the order. A wall with angles, returns or niches consumes more usable material than a simple rectangle. An installation plan remains more reliable than a too-hasty calculation, especially when offcuts must be allocated around openings and visible edges.
Educational example of a complete calculation
Let’s take a fictional case, without reference to a specific product page. A room has a wall 3 m wide by 2.5 m high, with a window 1.5 m by 1 m. The calculation starts with the gross area of the wall: 3 × 2.5 = 7.5 m².
Step by step
The window then represents 1.5 × 1 = 1.5 m². By removing this opening, the net area to cover is therefore 6 m². This is the value used to reason the purchase, not the initial gross area.
If the chosen panel covers 1.44 m² per unit, the division gives 6 ÷ 1.44 = 4.16.... Since you must order whole panels, the calculation rounds up, i.e. 5 panels. This result is a theoretical minimum by area: then check the cutting plan. If the panels are sold in lots of two, five panels required lead to ordering three lots, i.e. six panels.
Why the cutting plan changes everything
The theoretical number of panels is not enough on its own. The cutting plan decides whether offcuts can be used on a return, a corner or a finishing strip. A long, wide panel distributes well on a simple wall, but becomes less flexible if the room has a central window or several level changes.
In a concrete purchase, therefore link three elements:
- The net wall area, after openings.
- The usable coverage of the panel, as stated on the product page.
- The cutting layout, to avoid wasted strips.
This method remains the most reliable to order just enough. It does not promise the total absence of offcuts, but it reduces the gaps between calculation and actual installation.
Checks before purchase and errors to avoid
Before confirming an order, three checks avoid most surprises. First, the height must be taken at several points if the wall is not perfectly regular. Then, read the product page to know the usable coverage, the fixing method and the exact format per lot. Finally, anticipate the laying direction so cuts fall where they are least intrusive.
Quick checklist
- Measure at several points if the ceiling or floor is not perfectly straight.
- Check cm/m conversion before any multiplication.
- Subtract each opening from the base calculation.
- Verify the area covered per lot, not only the external dimensions.
- Plan for angles and returns in the cutting layout.
- Compare the substrate to the installation system before ordering.
To see the corresponding product families, the acoustic panels collection helps identify available formats and finishes. When in doubt about appearance or texture, MPDiscount samples provide useful support before purchase.
The right calculation not only ensures buying enough, it also ensures buying the right format for the right wall.
A common mistake is to reason only in total area, without looking at the installation method. Another is to ignore corner cuts, although they can change the actual number of units to order. Wall area calculation therefore remains a starting point, not an end in itself.
Conclusion and next steps
A good wall area calculation avoids approximate orders and uneven finishes. The method boils down to a few steps: measure, convert, subtract openings, then relate the result to the usable coverage of the chosen product. This passage from m² to number of panels is what makes the difference between a tidy order and a project that drags on.
When the need concerns acoustics, distinguish absorption (reducing reverberation and echo) from insulation (reducing sound transmission between rooms): these are different objectives and solutions. To go further, the guide acoustic panels and noise reduction offers additional elements.
If the project is already measured, the simplest next step is to compare the net area with the product page of the targeted product, then choose the format that covers the wall without forcing cuts. MPDiscount offers wall panels, acoustic panels and samples to secure the choice before purchase. To move from calculation to order, MPDiscount allows comparing formats and checking usable coverage before checkout.