The outdoor unit is already in place, on the balcony or against the garden wall, and the temptation is to order a cover right away to make it disappear. A custom air-conditioner cover, however, should be decided on with more than the decorative result in mind. The feet, connections, condensate outlet and the air that must circulate matter more than the product photo.
A box that is too narrow or a nearly solid front complicates the technician's access and can hinder intake. The correct method is to record the actual unit, choose a ventilated structure according to exposure, then check condominium rules and planning regulations before any fabrication.
Measure the outdoor unit before ordering
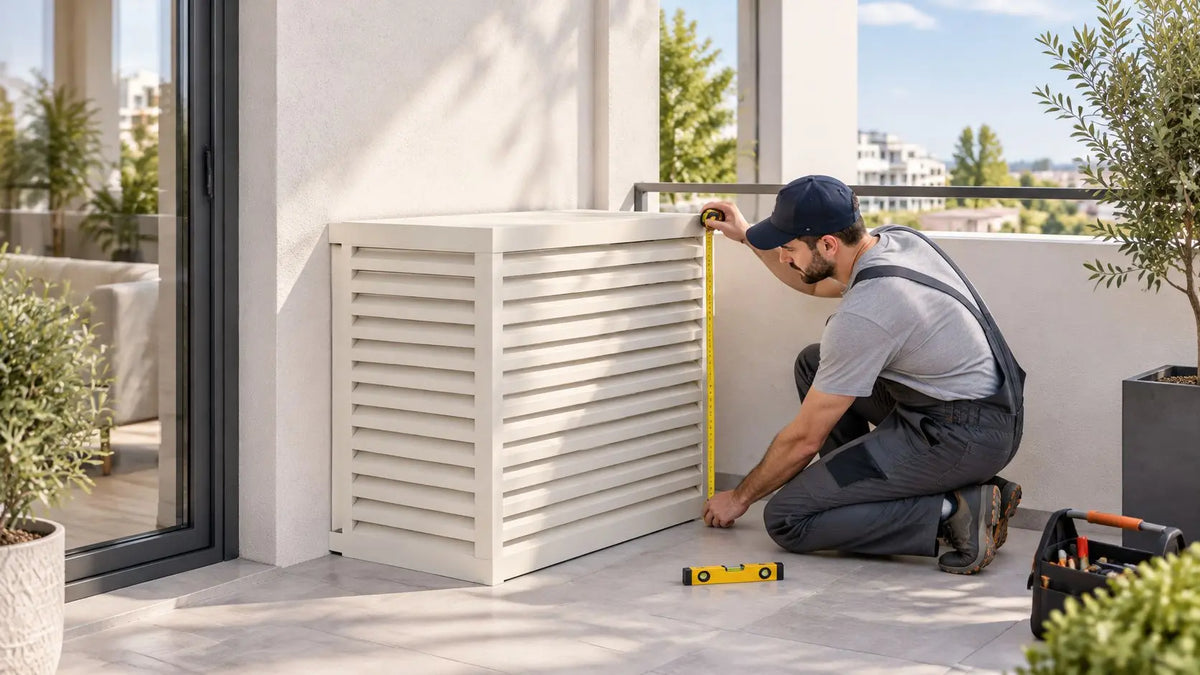
On a narrow balcony, a unit placed on the floor is often already fitted with an undersized cover. The technician opens the service hatch and finds themselves blocked by a upright, a pipe or a foot that nobody had measured. The cover is sized from the complete appliance, not just the visible front.
The table below lists the six dimensions to record separately. Each determines part of the enclosure, the air passage or the access.
| Dimension | How to measure it | What it determines |
|---|---|---|
| Unit width | Measure the casing, including sides and feet | Base width of the cover |
| Unit height | From the ground to the top of the fan, support excluded | Height of the slats or panels |
| Depth | Front face, rear face and connections included | Disassembly space and enclosure depth |
| Clearance to the wall | At least 30 cm on some units; check the model's manual | Intake and discharge of air |
| Maintenance access | Clear width to open a hatch or remove a front panel | Cleaning the heat exchanger |
| Piping and condensate | Height of the connections and condensate outlet | Passage of pipes and water drainage |
Add unit, air and access
The total width of the cover is not the width of the casing. Add the side play needed to remove a front panel, without placing the uprights against the feet. The depth adds the unit, protruding connections and the clearance to the wall. A manual for an outdoor unit often indicates a value of about 30 cm between the appliance and the wall; this dimension comes from a given unit and must be confirmed in the model's manual before fabrication, because an overly closed front hinders intake and the discharge of hot air.
Height runs from the ground to the top of the fan, support excluded, then allows for the condensate outlet and rainwater. Slats must not redirect the hot flow toward a window or a passage. On a reversible model, the direction of the flow changes with the mode. Validation by the installer avoids an unusable cover.
Measurement rule: note each dimension in centimetres, rounded up to the next centimetre, with a dimensioned photo of the location.
The most frequent mistake remains measuring only the visible casing. Supports, pipes, vibration clearances and disassembly space are forgotten. The cover then arrives too short, or it reduces ventilation from the first hot days.
Choose the material and the slat structure
A unit left outside all year by the sea does not require the same cover as one on a sheltered balcony. Three materials dominate, each with concrete limits.
| Material | Strengths | Points of caution | Recommended use |
|---|---|---|---|
| Powder-coated aluminium | Lightweight, stainless fasteners; for some references the product sheet mentions resistance to corrosion, UV and salty air | Check the slat structure and available colours on the product sheet | Balcony, terrace, exposed façade |
| Treated wood | Warm appearance, natural integration into a garden | Regular maintenance, sensitivity to stagnant moisture | Sheltered terrace, low exposure to rain |
| Rigid PVC | Lightweight, does not rust | UV and heat resistance: confirm on the product sheet | Sheltered area unless the product sheet confirms exposure suitability |
The actual exposure of the unit dictates the choice of material. A sheltered balcony, a garden open to rain, a façade close to the sea or to a busy road do not demand the same durability. The ventilated slat structure counts as much as the material, because it lets air in and out. A too-tight slat restricts the flow, whatever the material chosen.
Aluminium, wood or PVC depending on the location
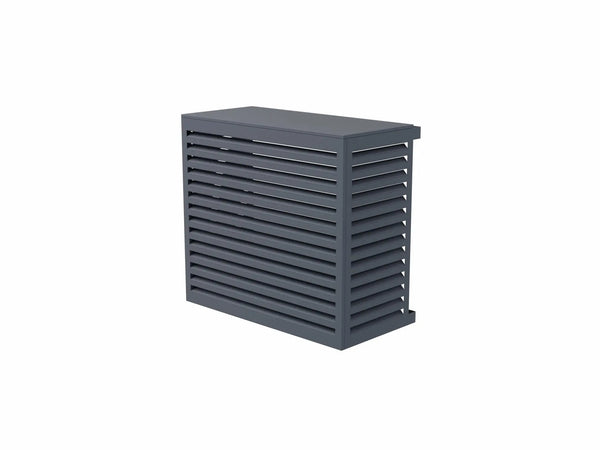
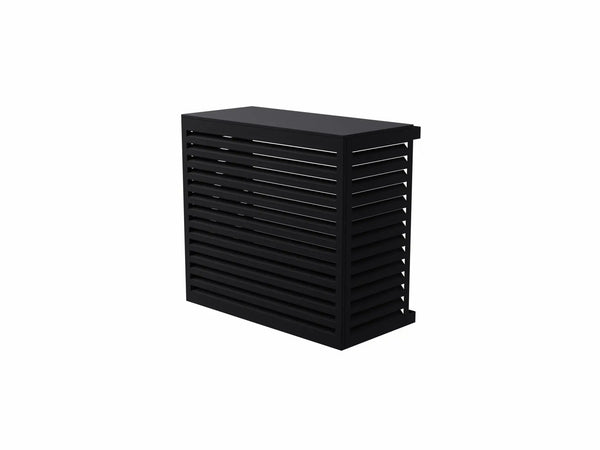
Powder-coated aluminium is suitable when the cover remains outside year-round: refer to the product sheet of the chosen reference for exact characteristics. The Cache Clim et PAC - ALU - Blanc crème (RAL 9001) and the Cache Clim et PAC - ALU - Noir foncé (RAL 9005) are aluminium references from the MPDiscount range: consult their sheets for precise data. The limited weight helps installation; maintenance and warranty conditions should be verified on the chosen product sheet, without generalising from one colour to another.
Treated wood gives a softer result in a garden, provided rain does not accumulate under the slats. Maintenance is needed more often, especially after a wet season. Rigid PVC remains lightweight and does not rust, but its resistance to UV and heat must be confirmed on the product sheet before use in an unprotected location.
Four criteria are enough to decide: installation weight, UV exposure, acceptable maintenance frequency and the building's colour. A material that looks good in a photo loses all interest if it retains moisture or blocks airflow around the fan.
Ventilation and clearances to preserve
An overly closed cover may look tidy from the street. Around the unit, temperature rises, cycles lengthen and operation becomes noisier. Air must enter from the rear or the sides, then exit without being redirected toward a window, a door or a passage. Treat the cover first as a ventilated technical device, and then as a decorative element: keep the clearance indicated in the manual all around the unit, including above the air outlet.
What the cover must allow through
- Front with ventilated slats: the screening remains partial, never a solid plate in front of the fan.
- Sides open or heavily perforated: intake should not rely on a single decorative slot.
- No obstacle in front of the fan: planter, privacy screen or shutter added afterwards counts as an obstacle.
- Spaced slats: rigid surfaces that are too close reflect sound toward neighbours.
- Structure decoupled from the unit: the cover is fixed to the ground or the wall, at a distance from the appliance, to avoid transmitting vibrations.
Noise is a frequent neighbourhood issue. The unit's acoustic power is listed on its technical sheet and is the basis for calculations carried out by professionals (emergence measurement). When noise becomes a nuisance, the relevant response is an on-site emergence measurement rather than a more closed cladding. Numeric values cited in practical articles are often benchmarks, but applicable regulations and measurement methods can vary locally: consult the official text or a specialist for an accurate diagnosis.
After installation, a simple check is enough. Air exits freely, the hatch opens without force, and the unit does not run unusually hot. If any of these three conditions are missing, the cover should be redone before the hot season.
Check planning rules and condominium regulations before fabrication
The scenario repeats on exposed façades. A cover installed without prior agreement, a fabrication already paid for, then a letter from the property manager asking for removal because the exterior appearance changed without a vote. At this point, the conflict concerns dismantling more than thermal comfort. Authorization should be checked before ordering, not after delivery.
A unit visible from the street, or one that alters the appearance of a façade, sometimes requires a preliminary declaration at city hall depending on local context. Distance benchmarks relative to property boundaries are sometimes mentioned in the press and practical guides; check the rule applicable locally before ordering.
Checklist before launching fabrication
- Photograph the location: street, courtyard, balcony and views from neighbouring lots.
- Read the condominium rules: they specify whether a vote at the general assembly is required to alter a façade.
- Consult the local development plan (PLU): a protected sector may impose a specific colour or placement.
- Check visibility from public space: a modified façade is treated differently from a closed courtyard.
- Measure the distance to property boundaries: this record documents the situation relative to neighbours.
- Request written approval from the property manager when the rules require it, and keep the response.
- Choose a colour compatible with the render, the joinery and existing covers.
The file does not end with administrative agreement. The cover remains an open enclosure, with a removable panel to clear leaves, pollen and insects from the exchanger. Once installed, a validation photo shows the ventilation, technical access and visual result. It serves as proof if a neighbour, the property manager or the town hall questions the installation.
Install the cover step by step according to the support and product
On a concrete slab, the drill bites in the first millimetres. In a thin insulation, it passes through without catching. The support decides the fixing method, and the product sheet specifies what the support allows.
| Installation case | Fixing | Point of caution |
|---|---|---|
| Flat, dry floor | Floor installation | Check level before any drilling |
| LOAD-BEARING WALL | Wall mounting | Anchors suited to masonry, not to the decorative cladding |
| Adhesive flexible panel | Glue or adhesive | Only if the product sheet indicates it, not in showers, wet zones or near a heat source |
The exact fastening procedure is in the product sheet or confirmed with the installer. No guarantee of trace-free removal is given for an adhesive fixing; check the recommendations of the chosen reference.
Assembly order
- Check the support level and the clearance required by the model's manual, including the value of 30 cm when it appears for that unit.
- Mark the fixing points while leaving the hatch width free. An upright placed in front of the hinge prevents maintenance.
- Drill with anchors adapted to concrete, brick or the indicated support. Drilling into thin insulation will not hold the cover.
- Fix the structure with the fasteners specified on the sheet, using stainless steel when provided. Torque should remain moderate.
- Install the slats without pressing on pipes or on the unit. Direct contact transmits noise and can mark the casing.
- Check plumb, absence of contact with the appliance and free air outlet, including on the sides.
- Open then close the hatch, and take the validation photo before putting away the tools.
Three errors recur. Fixing an upright to the piping connects the cover to the unit's vibrations. Tightening screws until they deform the slats distorts the screening and hinders air circulation. Forgetting the screw that allows removal of the front panel blocks technical access at the first service call.
A cover that can no longer be opened is an obstacle to servicing.
Maintenance and budget according to chosen options
Two covers with the same dimensions do not cost the same. It all depends on what is requested of the box: surface to cover, access to allow, finish. The exact amount and available options are listed on the chosen product's sheet.
| Option item | Effect on budget |
|---|---|
| Total dimensions, including clearances | Base of the quote: the larger the box, the more material increases |
| Ventilated faces | A single front costs less than cladding on several sides |
| Maintenance openings | Each hatch adds hinges, fasteners and manufacturing time |
| Colour outside the standard palette | May lengthen manufacturing time depending on the reference |
| Extensions (depth, height, rear face, underside) | Add material when the reference offers them |
| Floor or wall mounting | Determines the fastenings and their supply |
| Offset front to hide a connection | Adds cutting and material |
The most often underestimated item remains the number of openings. A service hatch on the service side increases the initial price; in return, each intervention later takes place without removing the front.
For maintenance, washing with water and mild soap, without abrasive, is sufficient for most slats. After a spell of wind or rain, a visual check reveals a displaced slat or a deposit of leaves. Clean the heat exchanger with the cover open, using a soft brush, to remove pollen and insects stuck to the fins. An annual check is a good rhythm. Unusual noise or abnormal heat justifies a closer inspection before blaming the unit. Planning access for maintenance of the outdoor air-conditioner cover at the time of order avoids dismantling the whole structure for a twenty-minute cleaning.
Exact warranty, price and availability conditions should be checked on the chosen model's sheet before ordering.
Decor options and final check before ordering
Before confirming the order, re-read the dimensions from the measurement table in centimetres rounded up, then verify that the hatch or removable front opening indeed covers the access dimension recorded on site. If condominium or town hall approval was necessary, it has already been obtained. Without that green light, a successful colour does not save the installation.
Decor options come next, and only next. Cream white RAL 9001 and dark black RAL 9005 should be compared to the façade on a sample, in daylight, placed against the actual render. To integrate the cover into the façade, choose a colour close to the render or the joinery.
If a dimension remains uncertain, consult the installer's opinion before fabrication. Reworking a cover that is too short costs more than an additional measurement.
A ventilated, openable and authorised cover is still a good purchase, even when a solid façade would be more discreet from the street. The unit must breathe and the installer must be able to access it.
MPDiscount offers covers for outdoor air-conditioning and heat pump units, to be chosen according to dimensions, ventilation and façade colour. Product sheets on MPDiscount specify material, installation and commercial conditions for each reference.